Showing posts with label DIY. Show all posts

Tuesday, April 9, 2013

Dollar Tree Wreath!

My kitchen and dining room are decorated with burlap, sunflowers and rustic decor. For a while now my dining room was missing some accent on an empty wall. I began searching my craft closet for something to make to fill the space. I found a wreath I had bought forever ago at the dollar tree tucked away, some burlap I had left over from curtains I made and some spare silk sunflowers I had also from another dollar tree project. So, for about $3 and 5 minutes I now had this...


Simple.
 
Cheap.
 
Cute.
 
Happy Crafting!
 
~Momma Keli~


Wednesday, February 22, 2012

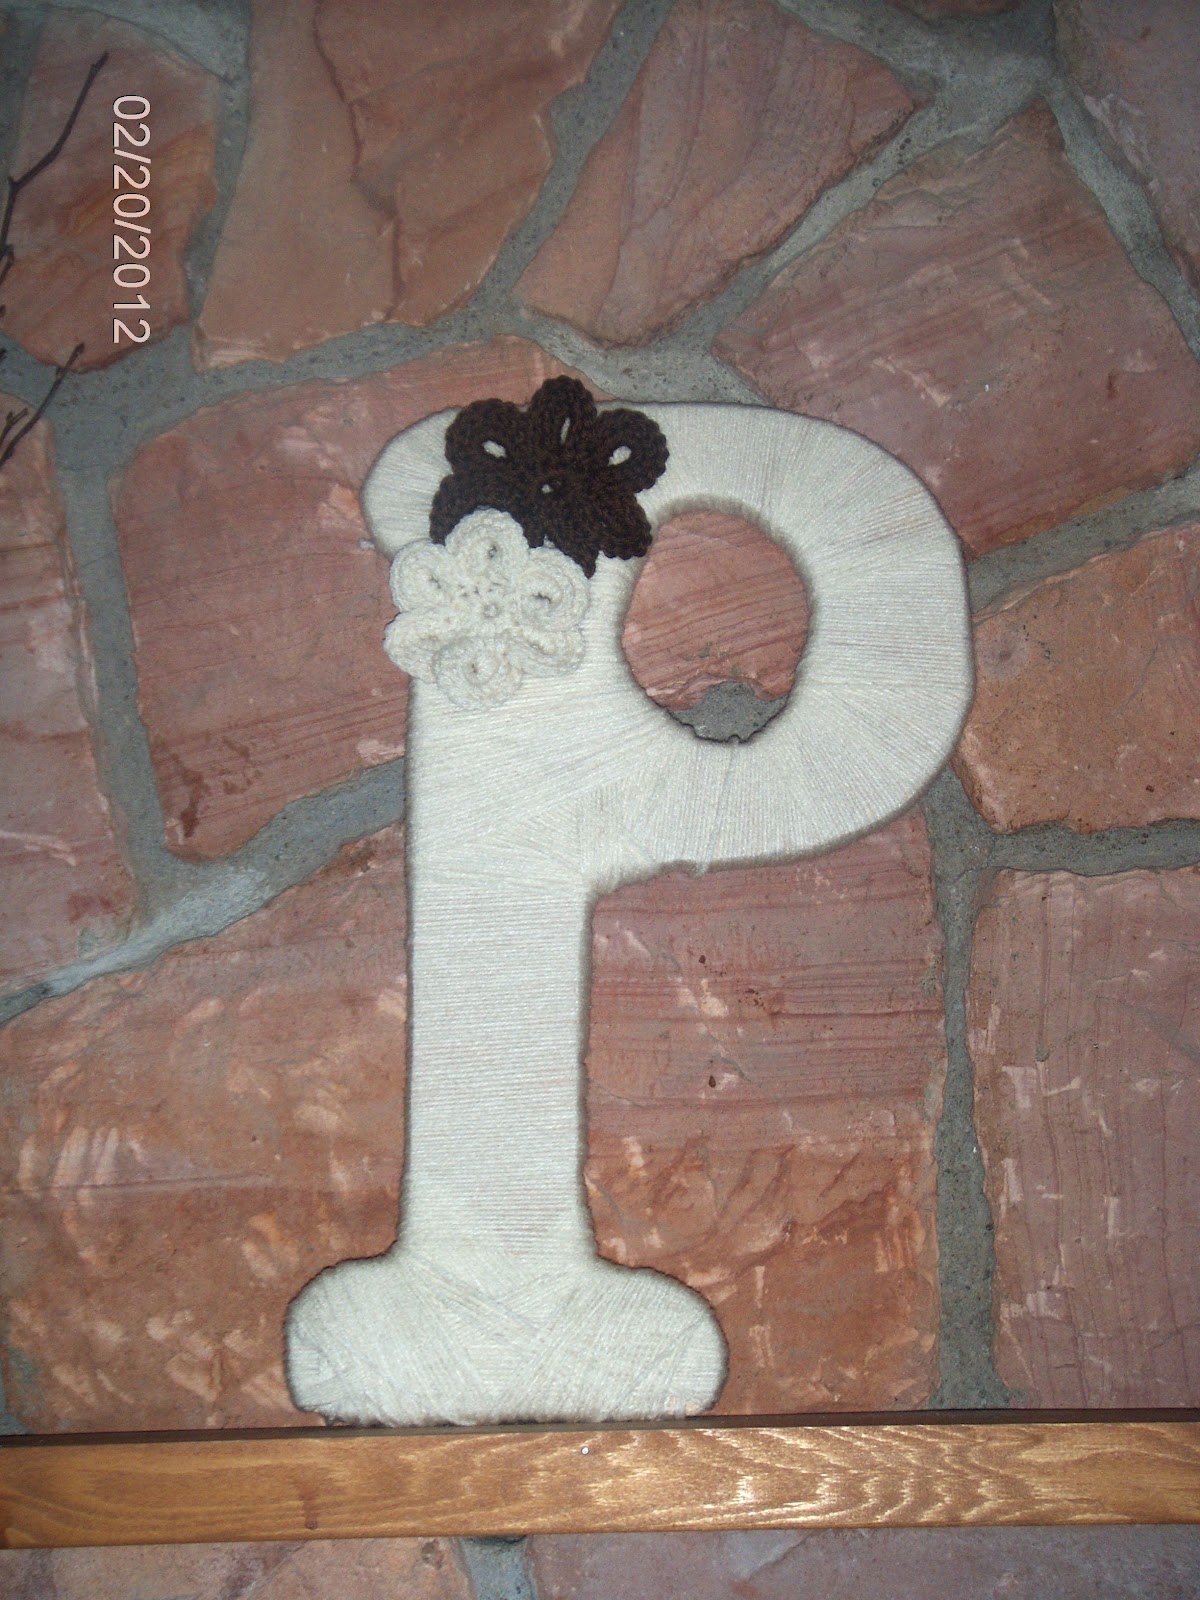
DIY Yarn Wrapped Monograms

Something about a monogram shouts, "Family Pride" to me. It is one of the best accents to make a house a home. I love the many ways you can find monograms displayed. Some that caught my eye were the wooden letters. They are found every where these days from babies rooms to front doors. Fonts, heights, thickness, materials the options are endless! But, have you seen the prices of the bigger sizes? Ouch! 

Well, being as frugal as we are, I begged the husband to use some of our scrap wood and cut me one. :) 


Next decision was to paint or not to paint?! I used pinterest to get my creative juices flowing and found so many people are making the yarn wrapped letters. What a great idea! I have an abundance of yarn tucked away in my craft closet. So I pulled out a neutral color that would fit in with our rustic decor and began wrapping. 

Since this letter was super sized to fit our gigantic mantel it took some time and brains to keep wrapping. I will openly admit that it has its flaws if you look close enough; but I am happy with the results! 


Its another perfect addition to our mantel re-do. I also am so pleased at how it is all coming together and with no money spent on new supplies. Everything we have had just laying around. :)


~Keli~

Tuesday, February 7, 2012

DIY Picture Wall Shelf!


We recreated this for our mantel. Photos to come soon.


Yet another must have, pinterest inspired, pallet art piece to fill my home. 


This was the original inspiration for our newest addition to the 15' mantel.


This is our finished project...

Our side boards were a little wider so I played around with it and decided I liked frames on the outside too.

 What is your opinion?


This is floor to ceiling with our new bench and picture shelf! 


Getting close to a finished project with the mantel re-do. :)


Happy Crafting! 

~Keli~

Sunday, February 5, 2012

Leather Seat

We have a rock wall in our living room that spans 15 feet wide. It's home to our fire place and a mantel that is in need of some rescuing. 


As you can see we are in the works of dressing it up a little. (Ignore the pallet shelf on top that is finished now but wasn't in the picture. Updated post to follow with that soon!) While taking a break from the bedroom re-do I made that cute little bench. 


About two years ago I was working at a furniture store and we had leather fabric samples that were discontinued. There was a pretty big stack just waiting to be thrown away. Knowing someday I would find a purpose to up-cycle them, I kept them stowed away in my craft closet. I sewed the swatches together and then stuffed a pad inside. That made up the seat. For the back I had a little more trouble. I had sewed the leather pieces together and mounted them in a framed board and it just didn't look or feel right. I kept it up pondering for about a week on how I was going to make it fit. Yesterday, I had the hubby cut me a board the length of the seat. We took the fabric and stretched it around the board stapled and stuffed it. Mounted it above the seat and this is what we have.


 I love it so much more now that it looks like it fits. Its comfortable to sit at and filled in the big opening we had beside the fireplace.  

What do you all think? Any suggestions to fill in all this mantel space?

~Keli~

Wednesday, January 25, 2012

DIY Pallet Night Stands and Wall Hanging


Continuing on with the Pallet Furniture theme from last week; we made matching night stands.  Another item our room was lacking in. We wanted to continue making things with as little cost as possible; the only thing purchased were $3.00 worth of flowers from the dollar tree. 

We wanted to stay with the barn door style and the rough, raw wood. I didn't snap any pictures as the hubby was working on these. :( But, I can give a brief explanation. :) 

He made two square frames the width and depth we wanted them to be. Then he cut boards the height we wanted and nailed them to the four sides of the frame. Added the accent and a quick run over with the sander and voila! Repeat and there you have it! Two night stands. 

I love the combination of these candle holders, the flowers in a jar and the raw wood. Its beautiful!


This little beauty is one of my favorites so far...


This wall hanging was an interesting piece. After cutting the boards the right length for the night stands, we had this ladder looking piece left. It was too unique to just throw into the burn pile. We sat in our room just looking at it. I checked my "My love of Pallets" board on pinterest for ideas I had liked. Searching for some way to incorporate this wood. Then it hit me! I saw this cute pin..

Pinned Image

That's where the mason jars came from! We added the flowers to tie it in with the headboard. Then we stood back and said, "Wow". It just created itself! 


Capturing its beauty I found is not happening with my POS camera! 


Tell me what you think! I would love any more suggestions in this bedroom revamp of ours! We are currently working on a corner bench for our room! Stay tuned..

Happy Building! 

~Keli~

Wednesday, January 18, 2012

DIY Pallet Headboard


Thanks to Pinterest, I have an obsession with all things made from pallets. There are so many wonderful ideas to upcycle pallets. Plus, they are found in abundance and most places just give them away. I started pinning ideas that I liked, shared them with my husband and soon we both couldn't keep pallets off our minds. I checked craigslist for free pallets and found tons but most were an hour away. (The joys of small town living.) I decided before driving to get something that is free I would call around town. Well, my first call scored me with a lovely stack of 15 pallets. I am also told they have 10-30 on a regular basis. SCORE!! :)

Our first project we knew had to be a headboard. Our poor bedroom has been the most neglected room in our house! Complete with mismatched, garage sale furniture. Only thing new was our mattress that we bought two years ago. 

It started something like this: A 6' x 4' pallet. We moved the boards together to remove the gaps. 

Added a couple helpers. :)

Next, the hubby surprised me with barn door style accents. Which I absolutely LOVED!!


Lastly, we needed a finishing touch. I thought a monogram would have been best. But, if we ever wanted to get rid of this we decided on a heart. So, I grabbed some newspaper and made a stencil. 


We used some left over chalkboard paint. 
(Another love of mine.)


Here is the finished project. I am absolutely in love with its rustic charm!
I find myself walking past my room and just staring at it. 


It was that simple. Took about 3 hours to make. Start to finish. We used one big pallet and a third of a smaller one. All materials were what we had laying around or free. Completely free new piece of bedroom furniture! We still have 13 pallets left! :)

Stay tuned for more projects with pallets.

~Keli~