Tuesday, April 9, 2013

Freezer Breakfast Burritos!

Have you thought about freezer cooking and just aren't sure where to start? Well, you would be a lot like me then. I love, love, LOVE cooking for my family but some days there just isn't enough time! I work full-time, have a family and go to college full-time! I am a very busy momma! So, with time being limited I have been looking for more ways to simplify our time.
I already menu plan our dinner meals for a whole month. I get asked all the time what I do for breakfasts and lunches. My usual answer is something quick for breakfast and leftovers for lunch, however, this month I tried something new!
 
That is where these make ahead breakfast burritos came in!
 
 
Here is what I did...

 
Now for the explanation since sometimes pictures don't say it all. :)
 
I bought two pounds of ground pork sausage and added one pound to each skillet. Browned and crumbled each pan and drained all the excess grease. Next, I scrambled 9 eggs for each pan, dumped it in and heated through. In one pan I added a 4 oz can of diced green chili's for some added flavor! After all the egg mixture was cooked I set up the station. I heated the tortillas in the microwave for a minute or so. I added about a 1/3 cup of the egg mixture to each tortilla, topped with shredded cheese and rolled them up! I kept this going until I was out of mixture. I was able to make about a dozen burritos per pan of egg mixture. So, 24 total. Once they were all rolled I wrapped them tightly with seran wrap. Tucked them into freezer bags and put into the freezer! Easy Peasy!!
 
When you are ready to heat one: unwrap from the seran wrap, wrap in a paper towel and microwave for a 1 1/2 to 2 minutes. Enjoy!!
 
These were delicious! The kids love them, the hubby feels like he can get a home cooked breakfast on the go and I don't stress that my family is left hungry after their cereal. :)
 
 What ideas do you have for filling on the go bf meals?
Comment below and don't forget to follow!!
 
~Momma Keli~

Dollar Tree Wreath!

My kitchen and dining room are decorated with burlap, sunflowers and rustic decor. For a while now my dining room was missing some accent on an empty wall. I began searching my craft closet for something to make to fill the space. I found a wreath I had bought forever ago at the dollar tree tucked away, some burlap I had left over from curtains I made and some spare silk sunflowers I had also from another dollar tree project. So, for about $3 and 5 minutes I now had this...


Simple.
 
Cheap.
 
Cute.
 
Happy Crafting!
 
~Momma Keli~


Tinkerbell 2nd Birthday!!

Time to catch up on all the goodness I encountered over spring break. Having a break from work and college I embraced the free time and dived head first into all the crafts and projects I had been saving up for! First on the list was my Holly Dolly's 2nd birthday!

She has an obsession right now with princesses and Tinkerbell. So, I tossed the idea around, looked through several ideas on Pinterest before I settled on Tinkerbell. Are you ready for the excitement? Here we go!
 
Here is Holly in her Tinkerbell dress I made with all her accessories!
 

Next, we were onto food... Our main dish was pizza since we had a crowd to feed! But, we accompanied the pizza with all the fairy fixings!


With all the delicious snacks and the wonderful guests we needed some little treats...
 

The funnest little treat was our fairy wands which somehow I am missing the picture for! :( Bummer!! They were cute little delectable flower shaped rice krispy treats on top of pretzel rods, wrapped in seran wrap and tied with a ribbon.


Here is the very special birthday girl with her fabulous Auntie Summer!
 
We had our little guests come dressed in all their fairy gear! I had set out spare fairy wings for any little fairy that didn't have their own! Overall, the party was a huge success. My dolly was spoiled rotten, happy as can be, and very appreciative of her friends and family who made it!


Thank you for the special day!

~Momma Keli~

Thursday, March 7, 2013

"Cowboy and Indian Tacos"

Who ever thought that dress-up is for girls is sadly mistaken. In our house, my boys play dress-up more often than my dolly! We are constantly morphing from pirates to knights, cowboys to indians, skaters to sports members. When they embrace a form they carry through all the way. So, tonight upon hearing we were having Indian Tacos, the boys decided they needed to play cowboys and indians! Thus, leading us to "Cowboy and Indian Tacos" because as my 6 year old says, "chili is for cowboys and fry bread is for indians".


Fry Bread Recipe:

2 cups flour
1 Tablespoon Baking Powder
1 Teaspoon Salt
1 Cup Milk
Approx. 4 Cups oil

In a large bowl whisk together flour, baking powder, and salt. Then stir in milk until a dough is formed. (FYI- I have also done this with only self-rising flour and milk mixed together into a dough. It cuts out a few of the ingredients) Turn dough onto a floured surface and knead until a soft pliable dough. (Don't over knead as this will result in tough bread.) Let rest for 5 minutes. While dough is resting put oil in a large pot or a large frying pan and heat over medium heat. I know the oil is ready when I splash a small drop of water into the oil and it sizzles. Pinch off small to medium sized portions of the dough and roll out until 1/4 inch thick. Drop your rounds one at a time into the preheated oil. Let brown on one side and then flip and brown on the other. Stay close as this will go very quickly. Once you remove set on a plate lined with paper towels to absorb the extra grease. Brown remaining rounds. This recipe yeilds approx. 6-8, 6" fry bread rounds.


Once all rounds are fried top with chili, onion, cheese, lettuce, tomato, olives and sour cream! These are also very delicious to just put butter with cinnamon and sugar or jam. Yum!!

Enjoy!

Saturday, March 2, 2013

The Homestead- The Beginning

Last October the Hubby and I got the keys to our first home. It is exactly what we had been wanting for such a long time and truly was a dream come true. Nothing extravagant just a small house on a little over an acre and a short ways from town. We wanted outbuildings, lots of room for our kids to play and a house that wasn't over the top so we could make it our own.Well, since we had some minor renovations to get done on the inside throughout the winter we are now beginning the outside projects. Spring is in the air!

We have researched until our eyes were practically bleeding, priced out resources and now have mapped out the general plans for our "homestead". Our "homestead" will have designated areas or "zones". For example, we are going to have an inner yard for the kids and dog to roam free but contained with an inner fence. This will be the house, yard, and patio. Basically the areas we would entertain guests.

We are fencing off the entire outer perimeter of the property and will have small sections designed to optimize particular areas and their resources.We will have a playground which will also be fenced to keep critters out and my munchkins in. :) We have already bought a wooden play structure this winter and plan to find more play equipment to add!

My biggest project right now has been the garden and chickens. Thankfully, the previous owners had/left both. We are moving them to a better location to meet our plans but are happy to have the remains of their chicken coop and pen. We will also be fencing off the garden areawith a six foot fence to keep the deer out. This area is going to be about 35'x45', we will talk more about that in another post! Adjacent to the garden will be the chicken coop and run. We want the two close together so that after harvest the chickens can roam free in the garden area to clean and fertilize the ground! We are getting chicks this spring! The existing property has a small "orchard" as I plan to make it and fruit patch. There are two apple trees, two pear trees and a netted strawberry patch. We are keeping all of these and are adding to it. We plan to plant more fruit trees and then are utilizing some empty space to plant raspberries, blueberries,and blackberries. I can't wait to preserve all this food!!

We have some empty space left for future planning and may down the road include small livestock, but we will see! Plenty of jobs to get done and we have begun where we can without breaking us or our budget. I plan to keep track of all our little projects and our journey of living on a one-acre homestead.

Monday, May 21, 2012

Why, Hello There!

Sorry about the no-notice leave of absence. :( I have had a hectic last six weeks. We had a sickness I thought we would never get over, spring break, surgery, switching day cares, end of preschool, start of t-ball and all the other woes of life in general. I think I have finally got everyone mended and have established our new routine. Now, back to blogland!

I can't wait to share with you all the projects I have completed, started and planned for. Eeeek! The excitement is killing me! Once that sun starts to shine I can't help but feel anything but crafty. :D


~Keli~

Sunday, March 25, 2012

Minnie Mouse 1st Birthday Party!!


Happy 1st Birthday Holly!!!

We had an amazing 1st birthday celebration. Holly was surrounded by lots of family and friends! This was the only picture I was able to snap of the two of us!
 :( But, that's the price you pay being hostess to a one year old and her friends. ;)


I had several crafts leading up to this day and didn't take any tutorial pictures. However, most projects were inspired by others who had some awesome tutorials for you all!

I know you all are checkin' out my "cute as a button" Minnie mouse ears. :)
The Suburban Mom had the easiest tutorial I could find to whip these out quickly and budget friendly. 

The cake and cupcakes were inspired by many pictures, blogs and pins. I went with cherry chip cake so it flowed with the pink and white Minnie theme. I topped them with pink cream cheese frosting. Sprinkled with edible pearls and the ears are Hershey drops! They were delicious!  


Food is always a big test for me. Do we have a meal? Snacks? Just cake and ice cream? Well, since this IS for my 1 year old I went with finger foods! It was a nice, stress-less idea! Lots of my amazing friends brought a dish and we even had Minnie cakepops! It was a feast. 


No party is complete without the perfect birthday outfit! This is a Minnie inspired pillow case dress. I couldn't resist making one. They are too simple not to have one in every color! Plus, my favorite part is that they can be worn from a dress to a top as they grow! 


Happy Birthday Sweet Girl!

~Keli~

Thursday, March 15, 2012

Ballpark Burritos!


Ballpark Burritos
NY style and Chicago Style

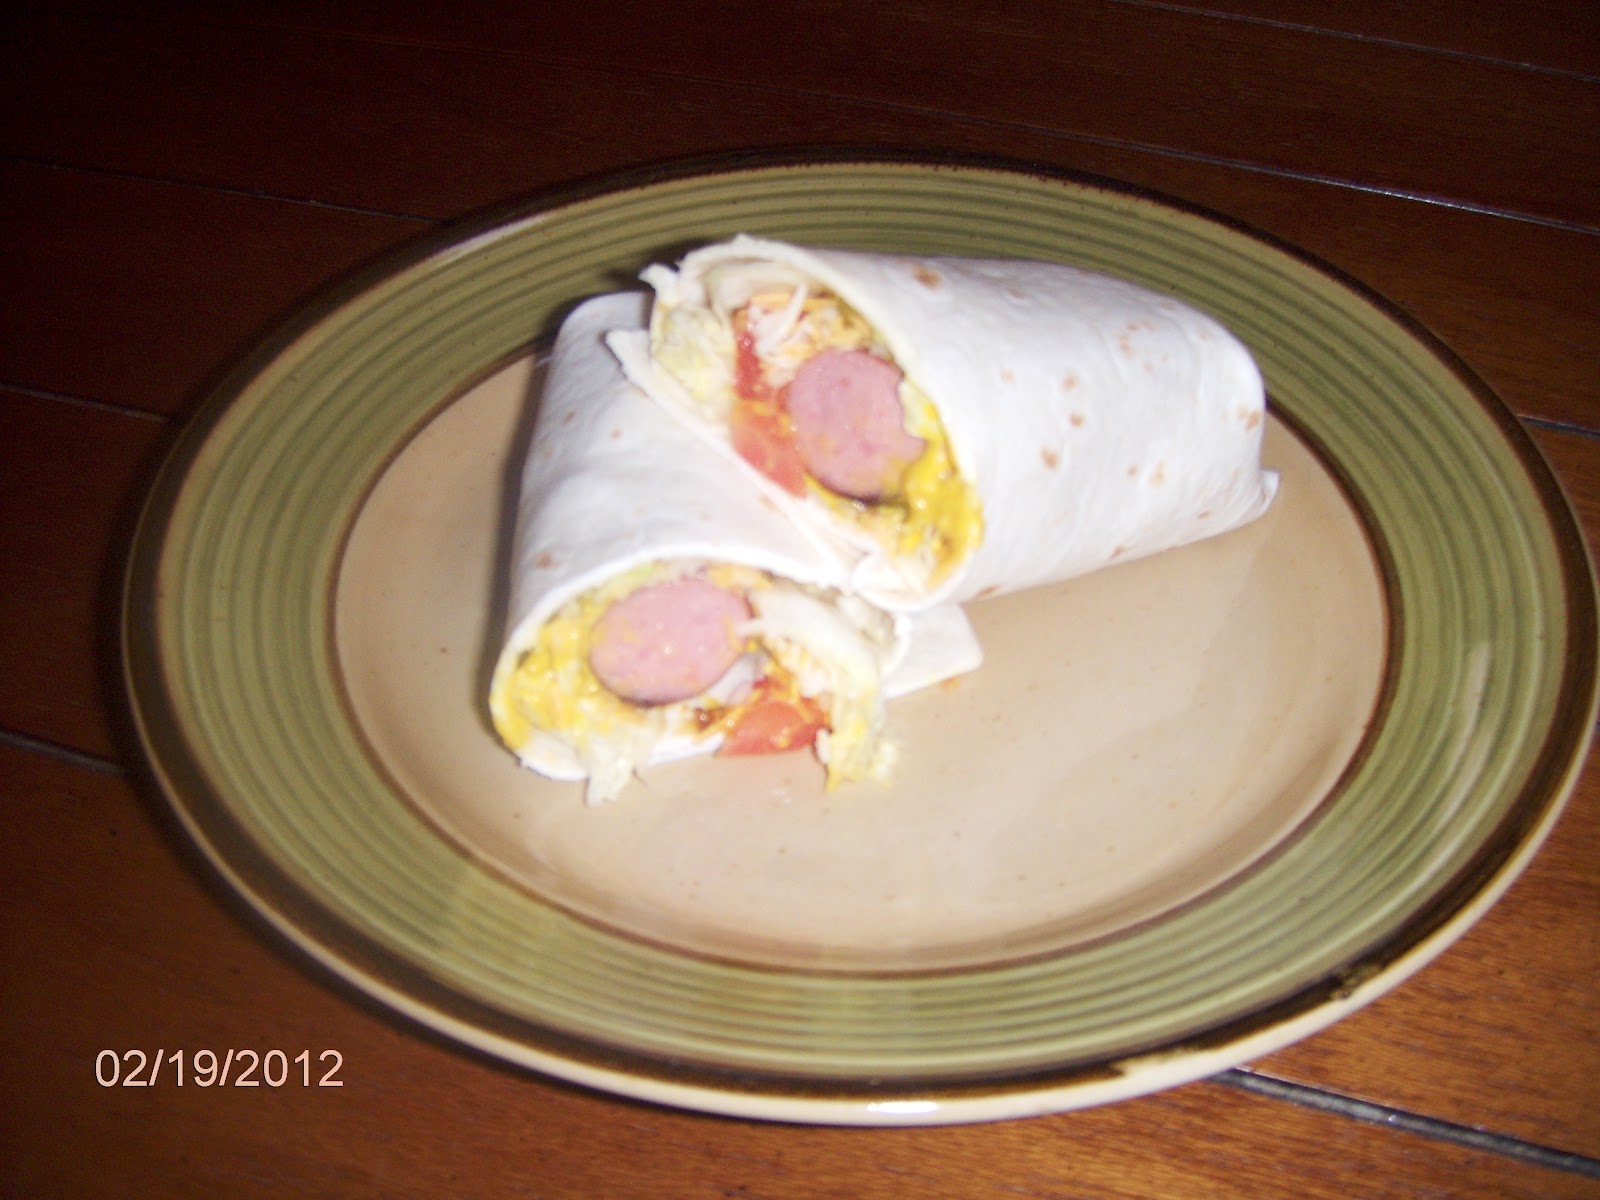
I am a couponer and as a couponer I am always coming across free or almost free hot dogs. My boys love themselves a good dog! But, we get tired of the standard hot dog and bun. I came across these one day in a cookbook I have and thus a hotdog has never been the same since! 

First, you must learn how to braise a hotdog. Seriously. After having eaten them this way I may never eat them any way else again! Brings out all the delicious flavors that I never knew were in a frank.

Place the hotdogs in a skillet with 1/4 inch water and a drizzle of oil. Bring the water to a boil, reduce the heat to a simmer and allow the water to cook off while the dogs warm through. When the water has cooked off cover the pan with a lid to reduce splatter and allow the casings to crisp for 1 minute, shaking the pan a few times. Now, they are cooked and ready to be devoured! 

Chicago Ballpark Burrito

Ingredients:
1/4 c. mustard
2 tbsp white wine vinegar
1/4 c. extra-virgin olive oil
lettuce, chopped
2 tomatoes cut into wedges
1/2 red onion, thinly sliced
pepper
salt
4 lg. tortillas
1/2 c. sweet relish
4 lg pickle spears
4 braised hot dogs

Whisk the mustard, vinegar and olive oil in a medium salad bowl. Add the lettuce, tomatoes and onions to the bowl, toss to coat. Season with salt and pepper to taste. One at a time, blister the tortillas on both sides. Build the burritos by piling some salad, topping with relish, add a pickle spear and a dog. Tuck in the sides, then wrap and roll the burrito. Repeat with remaining dogs.

N.Y. Deli Ballpark Burrito

Ingredients:
1 can BBQ baked beans
2 tsp hot sauce
1 tsp Worcestershire sauce
black pepper
sauerkraut
1/4 c. spicy mustard
1c. beer
4 lg tortillas
4 slices Swiss cheese
1 small onion, chopped
4 braised hot dogs

Heat beans in saucepan. Spice them up with the hot sauce, Worcestershire and pepper. 

Combine sauerkraut, mustard and beer in a pan. Boil and simmer for 5 min.

Blister tortilla on both sides, place Swiss cheese on tortilla and let melt for 1 min. Transfer tortilla to a plate and top with beans, sauerkraut, onion and a dog. Tuck, wrap and roll. 

YUMMY!!! 


Wednesday, February 22, 2012

DIY Yarn Wrapped Monograms

Something about a monogram shouts, "Family Pride" to me. It is one of the best accents to make a house a home. I love the many ways you can find monograms displayed. Some that caught my eye were the wooden letters. They are found every where these days from babies rooms to front doors. Fonts, heights, thickness, materials the options are endless! But, have you seen the prices of the bigger sizes? Ouch! 

Well, being as frugal as we are, I begged the husband to use some of our scrap wood and cut me one. :) 


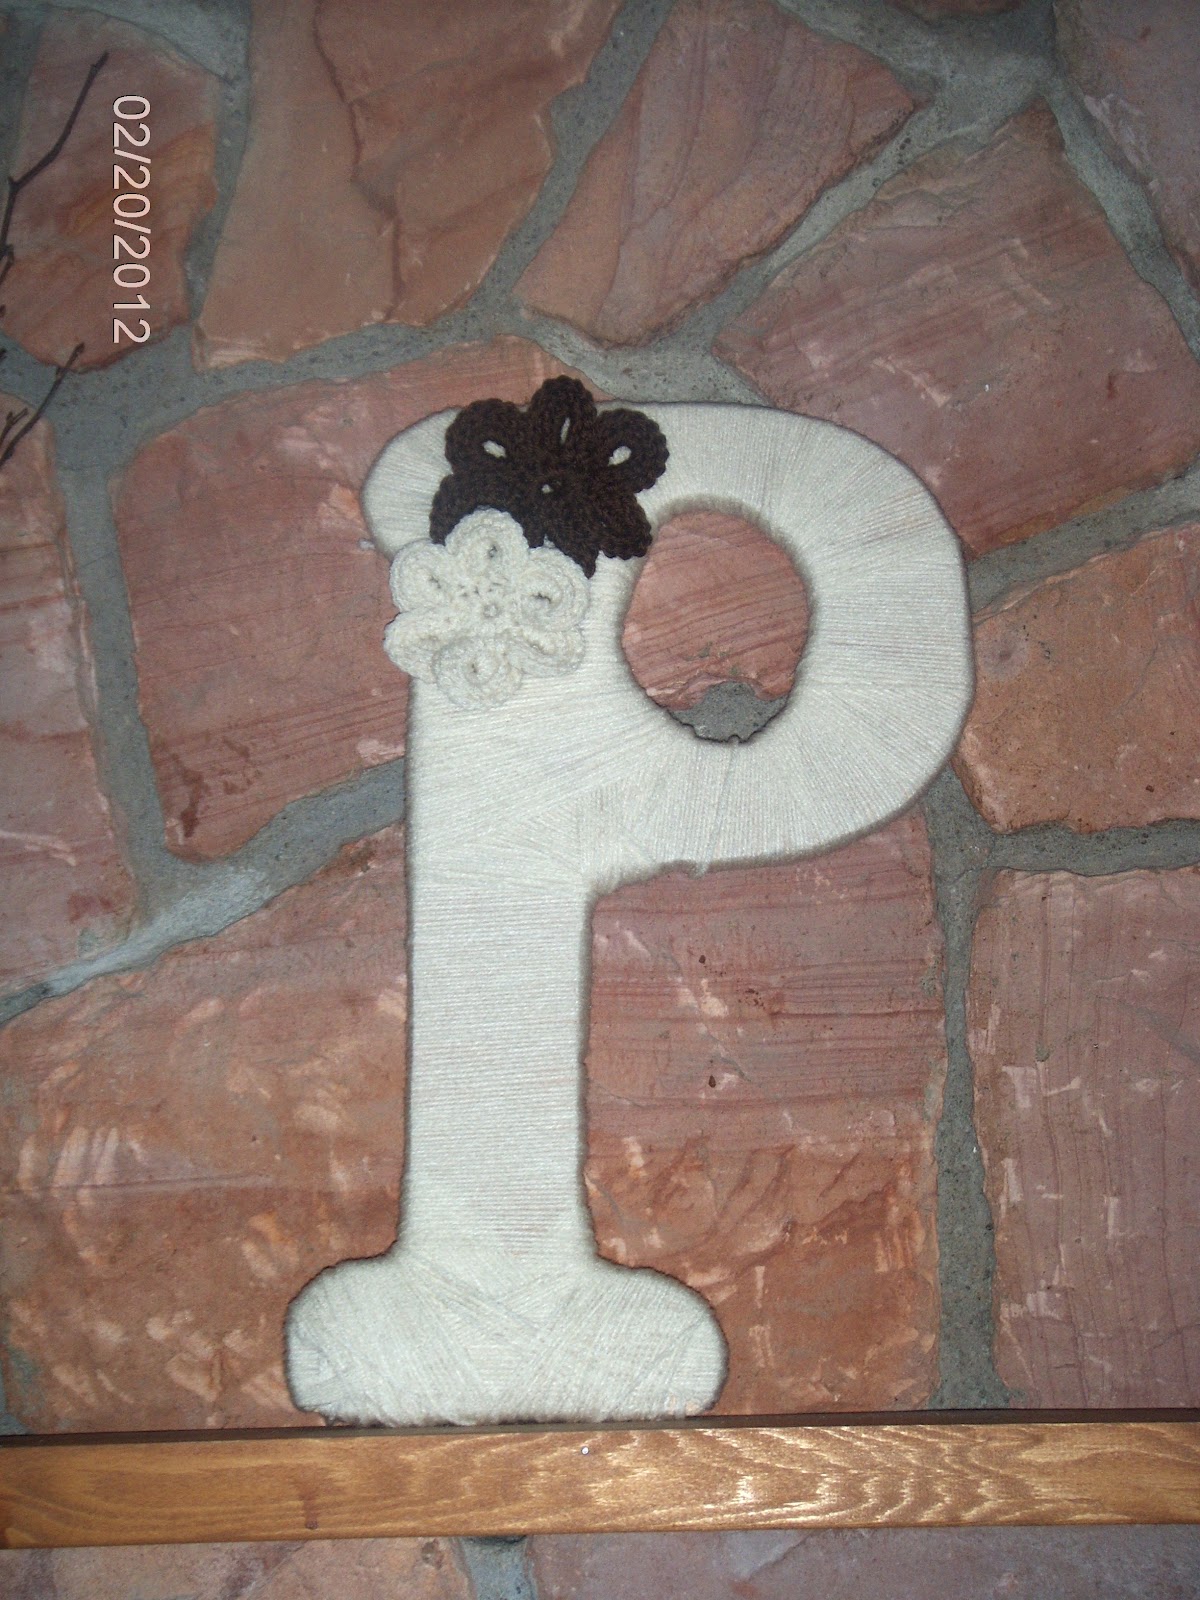
Next decision was to paint or not to paint?! I used pinterest to get my creative juices flowing and found so many people are making the yarn wrapped letters. What a great idea! I have an abundance of yarn tucked away in my craft closet. So I pulled out a neutral color that would fit in with our rustic decor and began wrapping. 

Since this letter was super sized to fit our gigantic mantel it took some time and brains to keep wrapping. I will openly admit that it has its flaws if you look close enough; but I am happy with the results! 


Its another perfect addition to our mantel re-do. I also am so pleased at how it is all coming together and with no money spent on new supplies. Everything we have had just laying around. :)


~Keli~

Monday, February 20, 2012

Crock Pot Hawaiian Chicken

Crock Pot Hawaiian Chicken!

Ingredients:
4 boneless, skinless chicken breasts
1 can of chunk pineapple
1 medium onion, cut into chunks
2 bell peppers, cut into chunks
1 bottle of Hawaiian style BBQ sauce or Hawaiian sweet and sour sauce


Toss it all in the crock pot. My chicken was frozen so I cooked it all on high for 5 hours and then on low until dinner time. It was so moist and full of flavor. If you want a little spice toss in a pinch of red pepper flakes. :) The chicken just fell apart so no shredding or cutting needed! I served this over a bed of white rice. 

Yum!


Happy Dining! 
~Keli~

Tuesday, February 7, 2012

DIY Picture Wall Shelf!


We recreated this for our mantel. Photos to come soon.


Yet another must have, pinterest inspired, pallet art piece to fill my home. 


This was the original inspiration for our newest addition to the 15' mantel.


This is our finished project...

Our side boards were a little wider so I played around with it and decided I liked frames on the outside too.

 What is your opinion?


This is floor to ceiling with our new bench and picture shelf! 


Getting close to a finished project with the mantel re-do. :)


Happy Crafting! 

~Keli~

Sunday, February 5, 2012

Leather Seat

We have a rock wall in our living room that spans 15 feet wide. It's home to our fire place and a mantel that is in need of some rescuing. 


As you can see we are in the works of dressing it up a little. (Ignore the pallet shelf on top that is finished now but wasn't in the picture. Updated post to follow with that soon!) While taking a break from the bedroom re-do I made that cute little bench. 


About two years ago I was working at a furniture store and we had leather fabric samples that were discontinued. There was a pretty big stack just waiting to be thrown away. Knowing someday I would find a purpose to up-cycle them, I kept them stowed away in my craft closet. I sewed the swatches together and then stuffed a pad inside. That made up the seat. For the back I had a little more trouble. I had sewed the leather pieces together and mounted them in a framed board and it just didn't look or feel right. I kept it up pondering for about a week on how I was going to make it fit. Yesterday, I had the hubby cut me a board the length of the seat. We took the fabric and stretched it around the board stapled and stuffed it. Mounted it above the seat and this is what we have.


 I love it so much more now that it looks like it fits. Its comfortable to sit at and filled in the big opening we had beside the fireplace.  

What do you all think? Any suggestions to fill in all this mantel space?

~Keli~

Wednesday, January 25, 2012

DIY Pallet Night Stands and Wall Hanging


Continuing on with the Pallet Furniture theme from last week; we made matching night stands.  Another item our room was lacking in. We wanted to continue making things with as little cost as possible; the only thing purchased were $3.00 worth of flowers from the dollar tree. 

We wanted to stay with the barn door style and the rough, raw wood. I didn't snap any pictures as the hubby was working on these. :( But, I can give a brief explanation. :) 

He made two square frames the width and depth we wanted them to be. Then he cut boards the height we wanted and nailed them to the four sides of the frame. Added the accent and a quick run over with the sander and voila! Repeat and there you have it! Two night stands. 

I love the combination of these candle holders, the flowers in a jar and the raw wood. Its beautiful!


This little beauty is one of my favorites so far...


This wall hanging was an interesting piece. After cutting the boards the right length for the night stands, we had this ladder looking piece left. It was too unique to just throw into the burn pile. We sat in our room just looking at it. I checked my "My love of Pallets" board on pinterest for ideas I had liked. Searching for some way to incorporate this wood. Then it hit me! I saw this cute pin..

Pinned Image

That's where the mason jars came from! We added the flowers to tie it in with the headboard. Then we stood back and said, "Wow". It just created itself! 


Capturing its beauty I found is not happening with my POS camera! 


Tell me what you think! I would love any more suggestions in this bedroom revamp of ours! We are currently working on a corner bench for our room! Stay tuned..

Happy Building! 

~Keli~

Wednesday, January 18, 2012

DIY Pallet Headboard


Thanks to Pinterest, I have an obsession with all things made from pallets. There are so many wonderful ideas to upcycle pallets. Plus, they are found in abundance and most places just give them away. I started pinning ideas that I liked, shared them with my husband and soon we both couldn't keep pallets off our minds. I checked craigslist for free pallets and found tons but most were an hour away. (The joys of small town living.) I decided before driving to get something that is free I would call around town. Well, my first call scored me with a lovely stack of 15 pallets. I am also told they have 10-30 on a regular basis. SCORE!! :)

Our first project we knew had to be a headboard. Our poor bedroom has been the most neglected room in our house! Complete with mismatched, garage sale furniture. Only thing new was our mattress that we bought two years ago. 

It started something like this: A 6' x 4' pallet. We moved the boards together to remove the gaps. 

Added a couple helpers. :)

Next, the hubby surprised me with barn door style accents. Which I absolutely LOVED!!


Lastly, we needed a finishing touch. I thought a monogram would have been best. But, if we ever wanted to get rid of this we decided on a heart. So, I grabbed some newspaper and made a stencil. 


We used some left over chalkboard paint. 
(Another love of mine.)


Here is the finished project. I am absolutely in love with its rustic charm!
I find myself walking past my room and just staring at it. 


It was that simple. Took about 3 hours to make. Start to finish. We used one big pallet and a third of a smaller one. All materials were what we had laying around or free. Completely free new piece of bedroom furniture! We still have 13 pallets left! :)

Stay tuned for more projects with pallets.

~Keli~